This guide walks you through building the ZeroSentinel Nano a lightweight recursive DNS resolver and local time authority that replaces your ISP’s tracking resolver with a clean, private, hardened DNS core. You’ll learn how to install Unbound and Chrony, isolate the Pi Zero into a single purpose node, lock it down with UFW, and point your entire network at it for fast, DNSSEC validated lookups.
Your Lightweight DNS + Time Authority for a Clean, Fast, Local Network
The Pi Zero isn’t here to be clever. It isn’t a canary box. It isn’t a monitoring hub. It’s the silent core of the ZeroSentinel stack a tiny, hardened DNS resolver and local NTP server that keeps your entire network stable without swallowing CPU cycles or becoming another attack surface.
Below is the complete, working setup. Everything included is here because it earned its place. Everything excluded was cut because it slowed the box down or added failure points. This is the blueprint.
Why This Node Exists
You’re building a layered privacy stack. You want:
- A local recursive DNS resolver you control
- A trusted time source that keeps DNSSEC and TLS from breaking
- A locked down, single purpose machine that isn’t running 15 services
- Something stable
You don’t want:
- Rust binaries choking on compilers
- Pi Zero RAM getting abused by crypto libraries
- Ten overlapping configs fighting each other
- DNS silently rewiring itself back to your ISP
So the Pi Zero becomes a isolated dedicated micro infrastructure node:
- Unbound
- Chrony
- UFW Firewall
- Auto heal
- Nothing else
Keeping your resolver and your time source on their own box is non negotiable if you want stability. DNS and clock drift aren’t just services in your stack. They’re the ground beneath it. When they wobble, everything above them collapses without telling you why.
VPN handshakes fail, TLS screams, DNSSEC breaks, and you waste hours chasing ghosts in the wrong direction. A tiny, single purpose Pi running Unbound and Chrony doesn’t buckle under load because it has nothing else to carry. Just clean recursion and a clean clock. And when the rest of your ZeroSentinel box gets patched, rebooted, or misconfigured, the resolver node keeps its footing.
That gives you something priceless during a failure. A known good. A fixed point in the chaos you can trust while you claw the rest of the system back.
1. Network Topology (Generic)
This is the abstract model for your physical setup: Upstream Router -> ZeroSentinel Nano
Connect a ethernet cable to your Pi Zero directly from your router’s LAN port using a ethernet to micro USB adapter. Connecting directly from your router will avoid any network weirdness during setup you can get from connecting from a WiFi repeater.
As long as the Pi Zero gets an IP and can reach the internet, the setup works. You just need it connected to your home network.
2. Flash Pi OS Lite 32-bit
On your computer use Raspberry Pi Imager to flash your MicroSD card with the image: Raspberry Pi OS Lite 32-bit
Before writing the image, click on Advanced Settings and set:
- Hostname: ZeroSentinel-Nano
- Enable SSH
- Set username as: zero
- Set a strong password.
- Set local time zone
- WiFi off (Ethernet recommended for stability)
Flash the image -> insert MicroSD into the slot on the Pi Zero -> boot the Pi by plugging in the power cord and wait a few minutes for it to boot and the router hand out an IP address.
SSH in by bring up a terminal and typing:
ssh zero@ZeroSentinel-Nano.localSign in using the password you set when you flashed the image. If ZeroSentinel-Nano.local isn’t working for some reason, try ssh zero@<Pi’s IP address> which can be found in the router’s dashboard under device list. Again, if you are physically connected to the network on the router itself or a repeater this shouldn’t be a issue.
3. Baseline Network Checks
Once you are in, check the network connections.
Check that it has a IP address:
ip aWrite down the eth0 or usb0 address. That is the Pi Zero’s assigned IP address and we will need it in a later step.
In my build it displayed as eth0 but Pi Zero often comes up as usb0 instead when using a micro USB Ethernet adapter. Note which one yours is listed as. If it is listed as usb0 you will have to make adjustments to a config files in Step #7
Check it has a internet connection:
ping -c 4 1.1.1.1Should see successful pings
Check that DNS is working:
ping -c 4 google.comShould see successful pings
The Pi must have:
- valid IP
- working DNS
- full internet access
If any of these checks fail, stop. Fix LAN issues first.
4. Update and Clean the OS
sudo apt update
sudo apt full-upgrade -y
sudo apt autoremove -y
sudo apt clean
Reboot:
sudo rebootYou want a clean base before adding services.
5. Install Your Recursive Resolver
The ZeroSentinel Nano design puts the resolver on its own tiny isolated machine and that isolation solves half the problems most home networks never even see coming. With DNS running separately, nothing on your main systems can interfere with recursion, poison the cache, break DNSSEC, or leak telemetry. The resolver has one job and one identity, so its logs stay clean, its behavior stays predictable, and its attack surface stays microscopic.
Install Unbound
sudo apt install -y unbound dnsutilsGrab the root hints:
sudo curl -o /var/lib/unbound/root.hints https://www.internic.net/domain/named.root
sudo chown unbound:unbound /var/lib/unbound/root.hints
Initialize DNSSEC trust anchor:
sudo unbound-anchor -a /var/lib/unbound/root.key
sudo chown unbound:unbound /var/lib/unbound/root.key
1. Test DNS resolution:
dig @127.0.0.1 cloudflare.comExpected:
- status: NOERROR
- flags include
ad
2. Test DNSSEC
Good signed domain:
dig @127.0.0.1 cloudflare.com +dnssecShould return:
- A records
- RRSIG
- ad flag set
Intentionally broken domain:
dig @127.0.0.1 dnssec-failed.orgExpected:
- status: SERVFAIL
- zero answers
If all the test returns look good you are rockin.
6. Add Automatic Root Hints Updates
Unbound does not auto update root.hints and stale hints eventually cause slower recursion or failures resolving new TLDs. A cron job keeps it clean with zero overhead.
1. Create a script to pull fresh root hints:
sudo nano /usr/local/sbin/update-root-hints.shPaste:
#!/bin/bash

curl -s -o /var/lib/unbound/root.hints https://www.internic.net/domain/named.root
chown unbound:unbound /var/lib/unbound/root.hints
systemctl restart unbound
Make it executable:
sudo chmod +x /usr/local/sbin/update-root-hints.sh2. Add a cron job to schedule it
sudo crontab -eAdd this to the bottom:
0 3 1 * * /usr/local/sbin/update-root-hints.sh >/dev/null 2>&1The updates now run on the 1st of every month at 3 AM.
7. Unbound Configuration
Lean, Hardened, Pi Friendly
Create the config:
sudo nano /etc/unbound/unbound.confPaste:
server:
    username: "unbound"
    directory: "/etc/unbound"
    pidfile: "/run/unbound.pid"

    # Listen on localhost
    interface: 0.0.0.0
    port: 53

    do-ip4: yes
    do-ip6: no

    # Access control
    access-control: 127.0.0.0/8 allow
    access-control: 192.168.1.0/24 allow
    access-control: 0.0.0.0/0 refuse

    # Performance tuning. Optimized for Pi Zero
    num-threads: 1
    msg-cache-size: 4m
    rrset-cache-size: 8m

    # DNSSEC
    auto-trust-anchor-file: "/var/lib/unbound/root.key"
    harden-dnssec-stripped: yes
    val-clean-additional: yes
    aggressive-nsec: yes
    prefetch: yes
    prefetch-key: yes

    # Privacy Hardening
    qname-minimisation: yes
    qname-minimisation-strict: yes
    hide-identity: yes
    hide-version: yes
    harden-glue: yes
    harden-referral-path: yes
    use-caps-for-id: yes
    do-not-query-localhost: no

    # Reduce noise and attack surface
    deny-any: yes
    unwanted-reply-threshold: 10000
    harden-large-queries: yes

    # Root recursion
    root-hints: "/var/lib/unbound/root.hints"

    # Logging (low cost)
    logfile: "/var/log/unbound.log"
    verbosity: 1

   # Disable Unbound-Control
   remote-control:
       control-enable: no
Apply it:
sudo unbound-checkconf
sudo systemctl restart unbound
sudo systemctl enable unbound
Why Unbound
Unbound is:
- A true recursive resolver, not a forwarder
- DNSSEC aware
- Memory efficient on low power hardware
- Battle tested
Unbound wins because it does the core job cleanly without dragging in complexity, side effects, or a giant dependency tree. It is small, auditable, memory efficient, and battle tested at every scale from Raspberry Pis to major ISPs. For a hardened privacy stack, the safest resolver is the one that only does the job you actually need. That’s Unbound.
8. Install a Firewall For LAN Only DNS
We added a firewall to the Sentinel Nano because a resolver should never answer to the open internet. Unbound and Chrony are intentionally minimal, so the firewall locks the box into a single role serving DNS and NTP only to your internal network. Nothing outside your LAN can query it, fingerprint it, or brute force it. This keeps the attack surface microscopic, prevents abuse, and guarantees the resolver stays a private internal asset instead of a public endpoint.
Install UFW:
sudo apt install -y ufwLock it down:
sudo ufw default deny incoming
sudo ufw default allow outgoing

# This ensures DNS is LAN only.
sudo ufw allow from 192.168.1.0/24 to any port 53 proto udp
sudo ufw allow from 192.168.1.0/24 to any port 53 proto tcp

# Only LAN devices can SSH into the ZeroSentinel Nano.
sudo ufw allow from 192.168.1.0/24 to any port 22 proto tcp

# Your LAN can sync time with chrony on the ZeroSentinel Nano.
sudo ufw allow from 192.168.1.0/24 to any port 123 proto udp

sudo ufw enable
sudo ufw status verbose
This firewall configuration locks the ZeroSentinel Nano into three allowed roles and nothing else:
- DNS server for LAN
- NTP server for LAN
- SSH endpoint for LAN administration
Everything else is stripped. Your ISP, neighbors, bots? Blocked. This is the cleanest, smallest attack surface a resolver can realistically have.
9. Add Self Healing to Unbound
Make Unbound restart if it crashes.
Run:
sudo mkdir -p /etc/systemd/system/unbound.service.d
sudo nano /etc/systemd/system/unbound.service.d/override.conf
Add:
[Service]
Restart=on-failure
RestartSec=5
Reload:
sudo systemctl daemon-reload
sudo systemctl restart unbound
This keeps the resolver alive even if the Pi hiccups.
10. Add a Local Trusted Network Time Protocol
DNSSEC and TLS break when your clock drifts. Isolating the NTP on the ZeroSentinel Nano keeps your time source clean, predictable, and tamper resistant. When Chrony runs on a general purpose box, load spikes, background services, or network noise can push the clock off just enough to break DNSSEC or destabilize secure protocols. By giving NTP its own lightweight environment, the clock never competes for resources and never inherits drift from other software. Your entire network ends up syncing to a single, stable, tightly controlled time source that isn’t influenced by apps, updates, or system processes. This is the simplest way to guarantee accurate trustworthy time across your stack.
- Faster sync for LAN devices
- Better DNSSEC stability
- Fewer outages
- Another dependency removed from your ISP
Install Chrony:
sudo apt install -y chronyConfigure:
sudo nano /etc/chrony/chrony.confAdd at the end:
allow 192.168.1.0/24
bindaddress 0.0.0.0
local stratum 10
Restart:
sudo systemctl restart chronyVerify:
chronyc sources
chronyc tracking
Why Chrony
Chrony is the best choice for this applicaiton. It corrects drift faster, handles intermittent connectivity, adapts to temperature and load changes, and stays accurate on small low power devices like the Pi Zero. In a privacy stack where DNSSEC and secure protocols depend on precise timing, Chrony gives you a tighter, more resilient clock with less overhead and fewer assumptions.
Plus Chrony is tiny enough that the Pi Zero barely notices it’s running.
11. Test NTP
From the Pi Zero run:
dig @127.0.0.1 cloudflare.com
chronyc tracking
From another device:
dig @<pi-ip> cloudflare.com
ntpdate -q <pi-ip>
If both respond instantly, you’re golden.
12. Make the ZeroSentinel Nano Your Network DNS
The ZeroSentinel Nano doesn’t protect anything until your network actually uses it. Unbound is running. Chrony is running. UFW is locked down. But right now your router is still handing out whatever DNS it came with, usually your ISP’s resolver or its own internal forwarder. That means your traffic is still bleeding upstream and your devices never touch the clean recursive stack you just built.
1. Lock the ZeroSentinel Nano’s IP in your router
Find the ZeroSentinel Nano in your router’s device list and create a DHCP reservation so it never changes addresses. If the Pi Zero gets a new IP later, everything breaks. Lock it now.
Example IP Address ONLY:
192.168.1.83 -> reserved for ZeroSentinel-Nano2. Point LAN DNS to the ZeroSentinel Nano
In your router’s LAN or DHCP settings, set the DNS server handed to devices to the ZeroSentinel Nano IP address. The exact method will vary based on your router so do a internet search for your router’s instructions.
Example:
LAN DNS Server: 192.168.1.83Save. Apply. Let the router push new leases to the network.
3. Renew leases on your devices
Devices won’t switch DNS until they renew DHCP.
Linux:
sudo dhclient -r && sudo dhclientWindows:
ipconfig /release
ipconfig /renew
Mac:
Toggle WiFi off then on.
iPhone or Android:
Toggle WiFi off then on.
Smart TVs:
Reboot.
4. Confirm the network is using the ZeroSentinel Nano
From any device on your LAN:
dig @192.168.1.83 cloudflare.comYou should see recursion times around 20–100ms depending on the network. If it answers instantly, you’re running local DNS.
Then test without specifying a resolver:
dig cloudflare.comIf the server line now shows the ZeroSentinel Nano’s IP, the switch is complete. Your router is feeding the ZeroSentinel Nano to everything on the network.
Why This Build Works (and Why We Cut Everything Else)
- WireGuard connection was beyond slow and would freeze on the first website.
- Trying to get the Pi to compile Rust for Nostr tooling burned the Zero to the ground
- Python crypto librarys froze
- Trying to make a Pi Zero fight outside it’s weight class created complexity without reliability
Even tried adding swap and I watched the poor thing just exchange files in and out of swap for two days without moving any closer to completion.
What survived the cuts were the things the Pi Zero does flawlessly:
1. Unbound
Pure recursive DNS. Fast. Local. Hardened.
2. Chrony
Keeps the time clean, which keeps DNSSEC and TLS alive.
3. Firewall
No inbound noise. No bleed.
4. Systemd auto-restart
If it dies, it recovers without supervision.
This is the ZeroSentinel Nano. Everything heavier (canary, alerts, logs, monitoring) now lives on another device where the CPU isn’t a constraint. This division of labor is what makes the overall system durable. The added isolation is genius.
The ZeroSentinel Nano
Running your own resolver cuts out the two biggest leaks in the modern internet: your ISP and any third party DNS provider. The moment you stop sending DNS queries upstream, you stop giving someone else a full map of your habits, routines, relationships, and interests. Nobody sells them. Nobody aggregates them. Nobody builds a behavioral profile out of them.
If you add nothing else to your privacy stack, add the ZeroSentinel Nano. A clean, isolated resolver and a stable internal time source fix problems you don’t see until they’ve already bitten you. Every device you own leans on DNS and time before anything else happens. If those two layers are dirty, inconsistent, or tampered with, the rest of your security posture is already compromised. Even without WireGuard, filtering, canaries, or IDSs, this one box hardens the foundation everything else depends on.
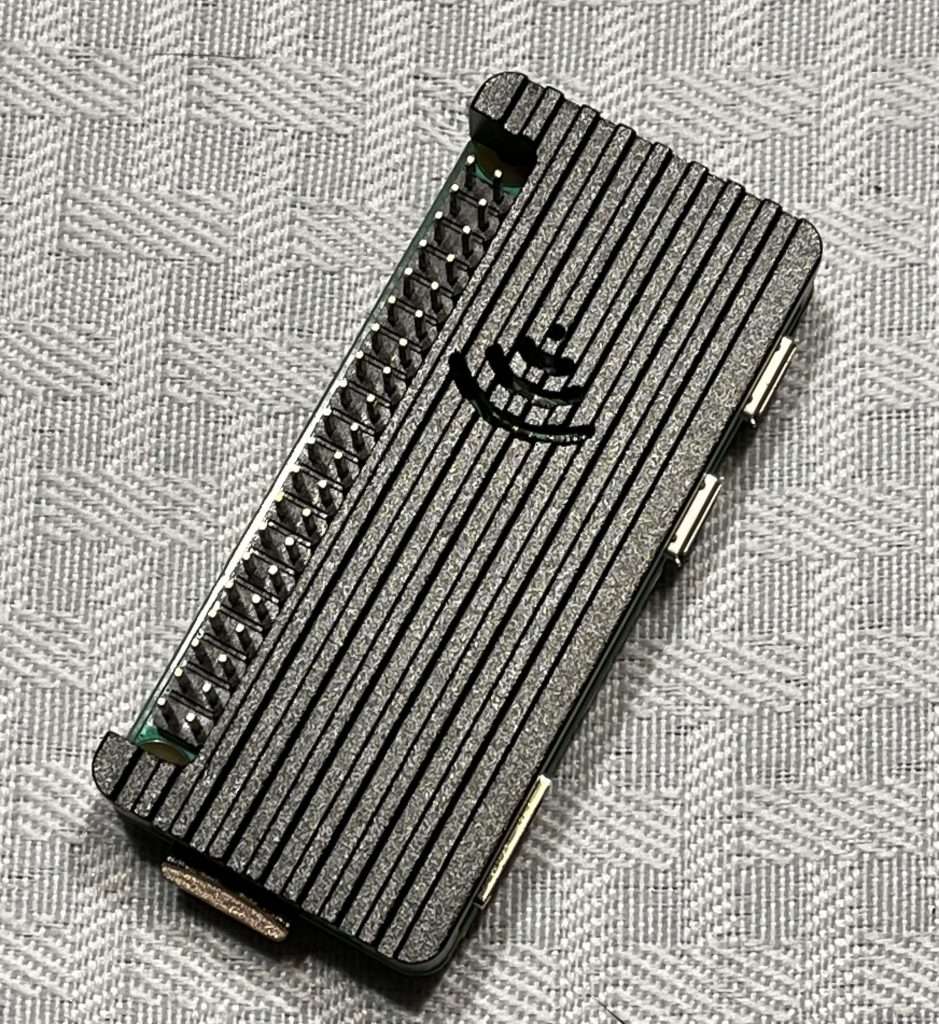
My own personal ZeroSentinel Nano
-GHOST
Written by GHOST, creator of the Untraceable Digital Dissident project.
This is part of the Untraceable Digital Dissident series — tactical privacy for creators and rebels.
Explore more privacy tactics at untraceabledigitaldissident.com.
- ZeroSentinel Hub – Your local privacy node